Cylinder Studs
Due to the fact that a Honda CB750 top end (head and cylinder) can grow .015 or more when at operating temperature, heavy duty cylinder studs are a good idea for stock and performance motors.
|
CYLINDER STUDS TECH TIPS |
Cylinder Studs
Due to the fact that a Honda CB750 top end (head and cylinder)
can grow .015 or more when at operating temperature, heavy duty cylinder studs are
a good idea for stock and performance motors.
Years ago, we had stock cylinder studs and various heavy duty cylinder
studs analyzed by A1 technologies. Turns out, that the stock
cylinder studs were better in various categories but are a bit spindly and
stretch more than most engine builders prefer. With the combination of
conventional head gaskets compressing up to .016 after X amount of miles and
stock cylinder studs stretching, the ability to keep the head gaskets
from leaking, compressing and keeping close tolerances for your
go-fast motor will generally make you lean toward the higher tolerance
range to be safe.
The various heavy duty cylinder studs we had analyzed simply obtained their
strength simply thru bulk. With added torque and the growth of the top end
under running conditions made some heavy duty studs fail or break at the
upper thread area.
Stud Manufacturing Process
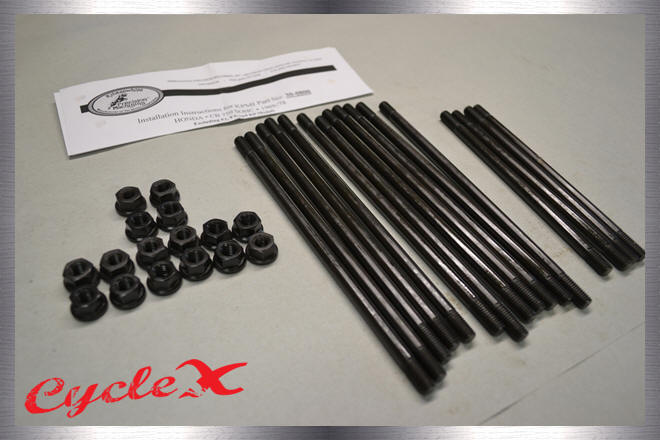
Premium performance studs made from
US-milled, heat treated and certified 4130 Chromalloy Steel for Honda SOHC
CB750's from 1969-78.
Both ends of these studs have been rolled and not die cut or single pointed.
Rolled threads produce the strongest possible thread.
When a thread is hydraulically roll-formed, the material is crushed between
hardened steel dies under hydraulic force which disrupt and forms a
work-hardened-thread.
Additionally, the pitch diameters of both ends of the stud are controlled to
produce an interference fit for the case end and a “special” fit on the nut
end.
Finally the body of the stud is centerless ground to remove “notch
sensitivity”/surface irregularities in which a stud is likely to fail under
stress.
Our Cycle X / Kibblewhite cylinder studs are simply the best.
Stud Removal and Installation
|
|
|
|
|
|
Works sometimes.
Many places sell studs and
installation tools.
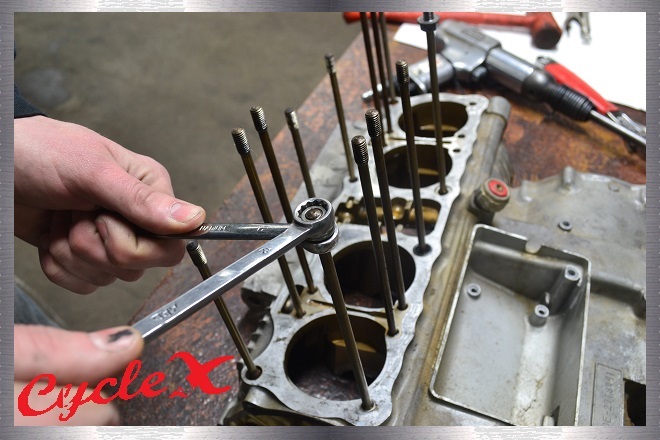
Due to the fact most stud removal
tools will not fit between the studs, we need a different plan.
|
This must be done.
Shocking the threads is a old
salvage yard trick.
|
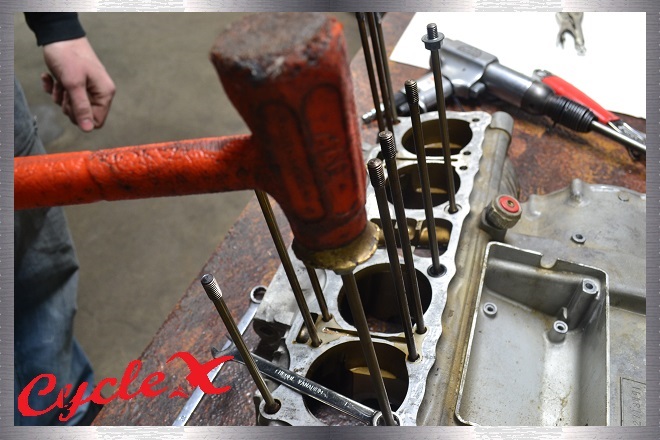
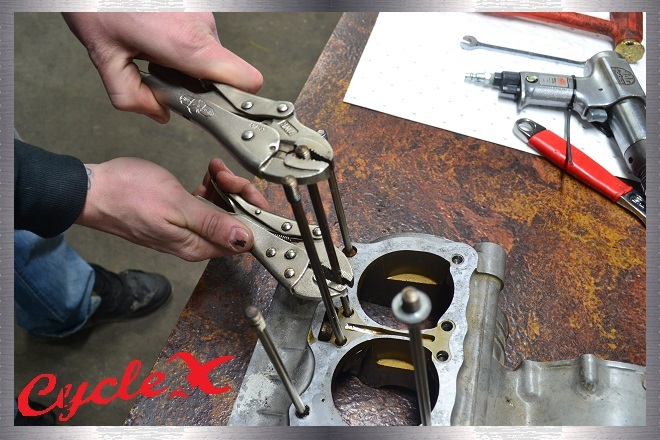
Works pretty good. Sometimes its just the simple things that get the job done. Putting a vice grip on the top and the bottom of the stud seems to work well. Also, by putting vice grip on the very top of the stud and shocking the threads, the hammer will have a better chance of hitting the stud rather than a glancing blow.
|
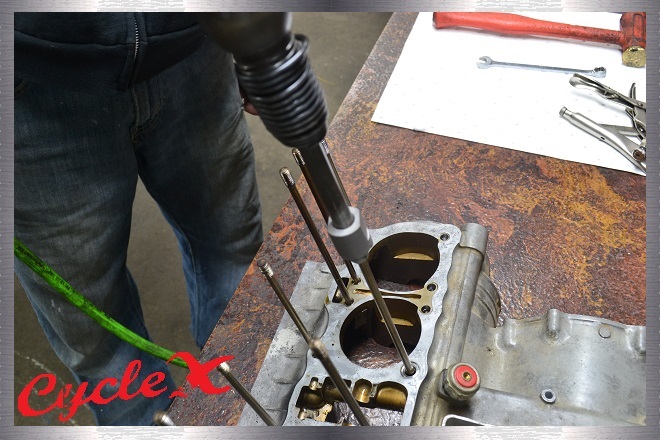
This works awesome. This idea can be duplicated for a cheap investment. You will notice that we have machined a threaded sleeved nut, so to speak. This sleeved nut holds our air impact in place so the "shocking the thread" technique can be done quicker and works almost every time.
|
Removing the old cylinder studs and breaking them can ruin your day.
We need to take some photos of how we remove old cylinder studs will be
coming soon.
We will also talk about the procedure do's and don'ts of installing your new
Heavy duty studs. (Stay tuned)
To be continued (Case studs)
Burnishing Threads
|
|
Very important,
burnishing the threads after installing new connecting rod bolts, heavy
duty cylinder studs and heavy duty case studs.
This technique is "super important" when new
threads on connecting rod bolts and heavy duty studs are used.
The reason is, new threads on studs are unfamiliar with new nut threads
or old nut threads.
For example:
After installing new cylinder studs into your engine cases and the
cylinder and head is ready to be tightened down. Apply high pressure or
heavy grease to the stud threads, nut threads and washers.
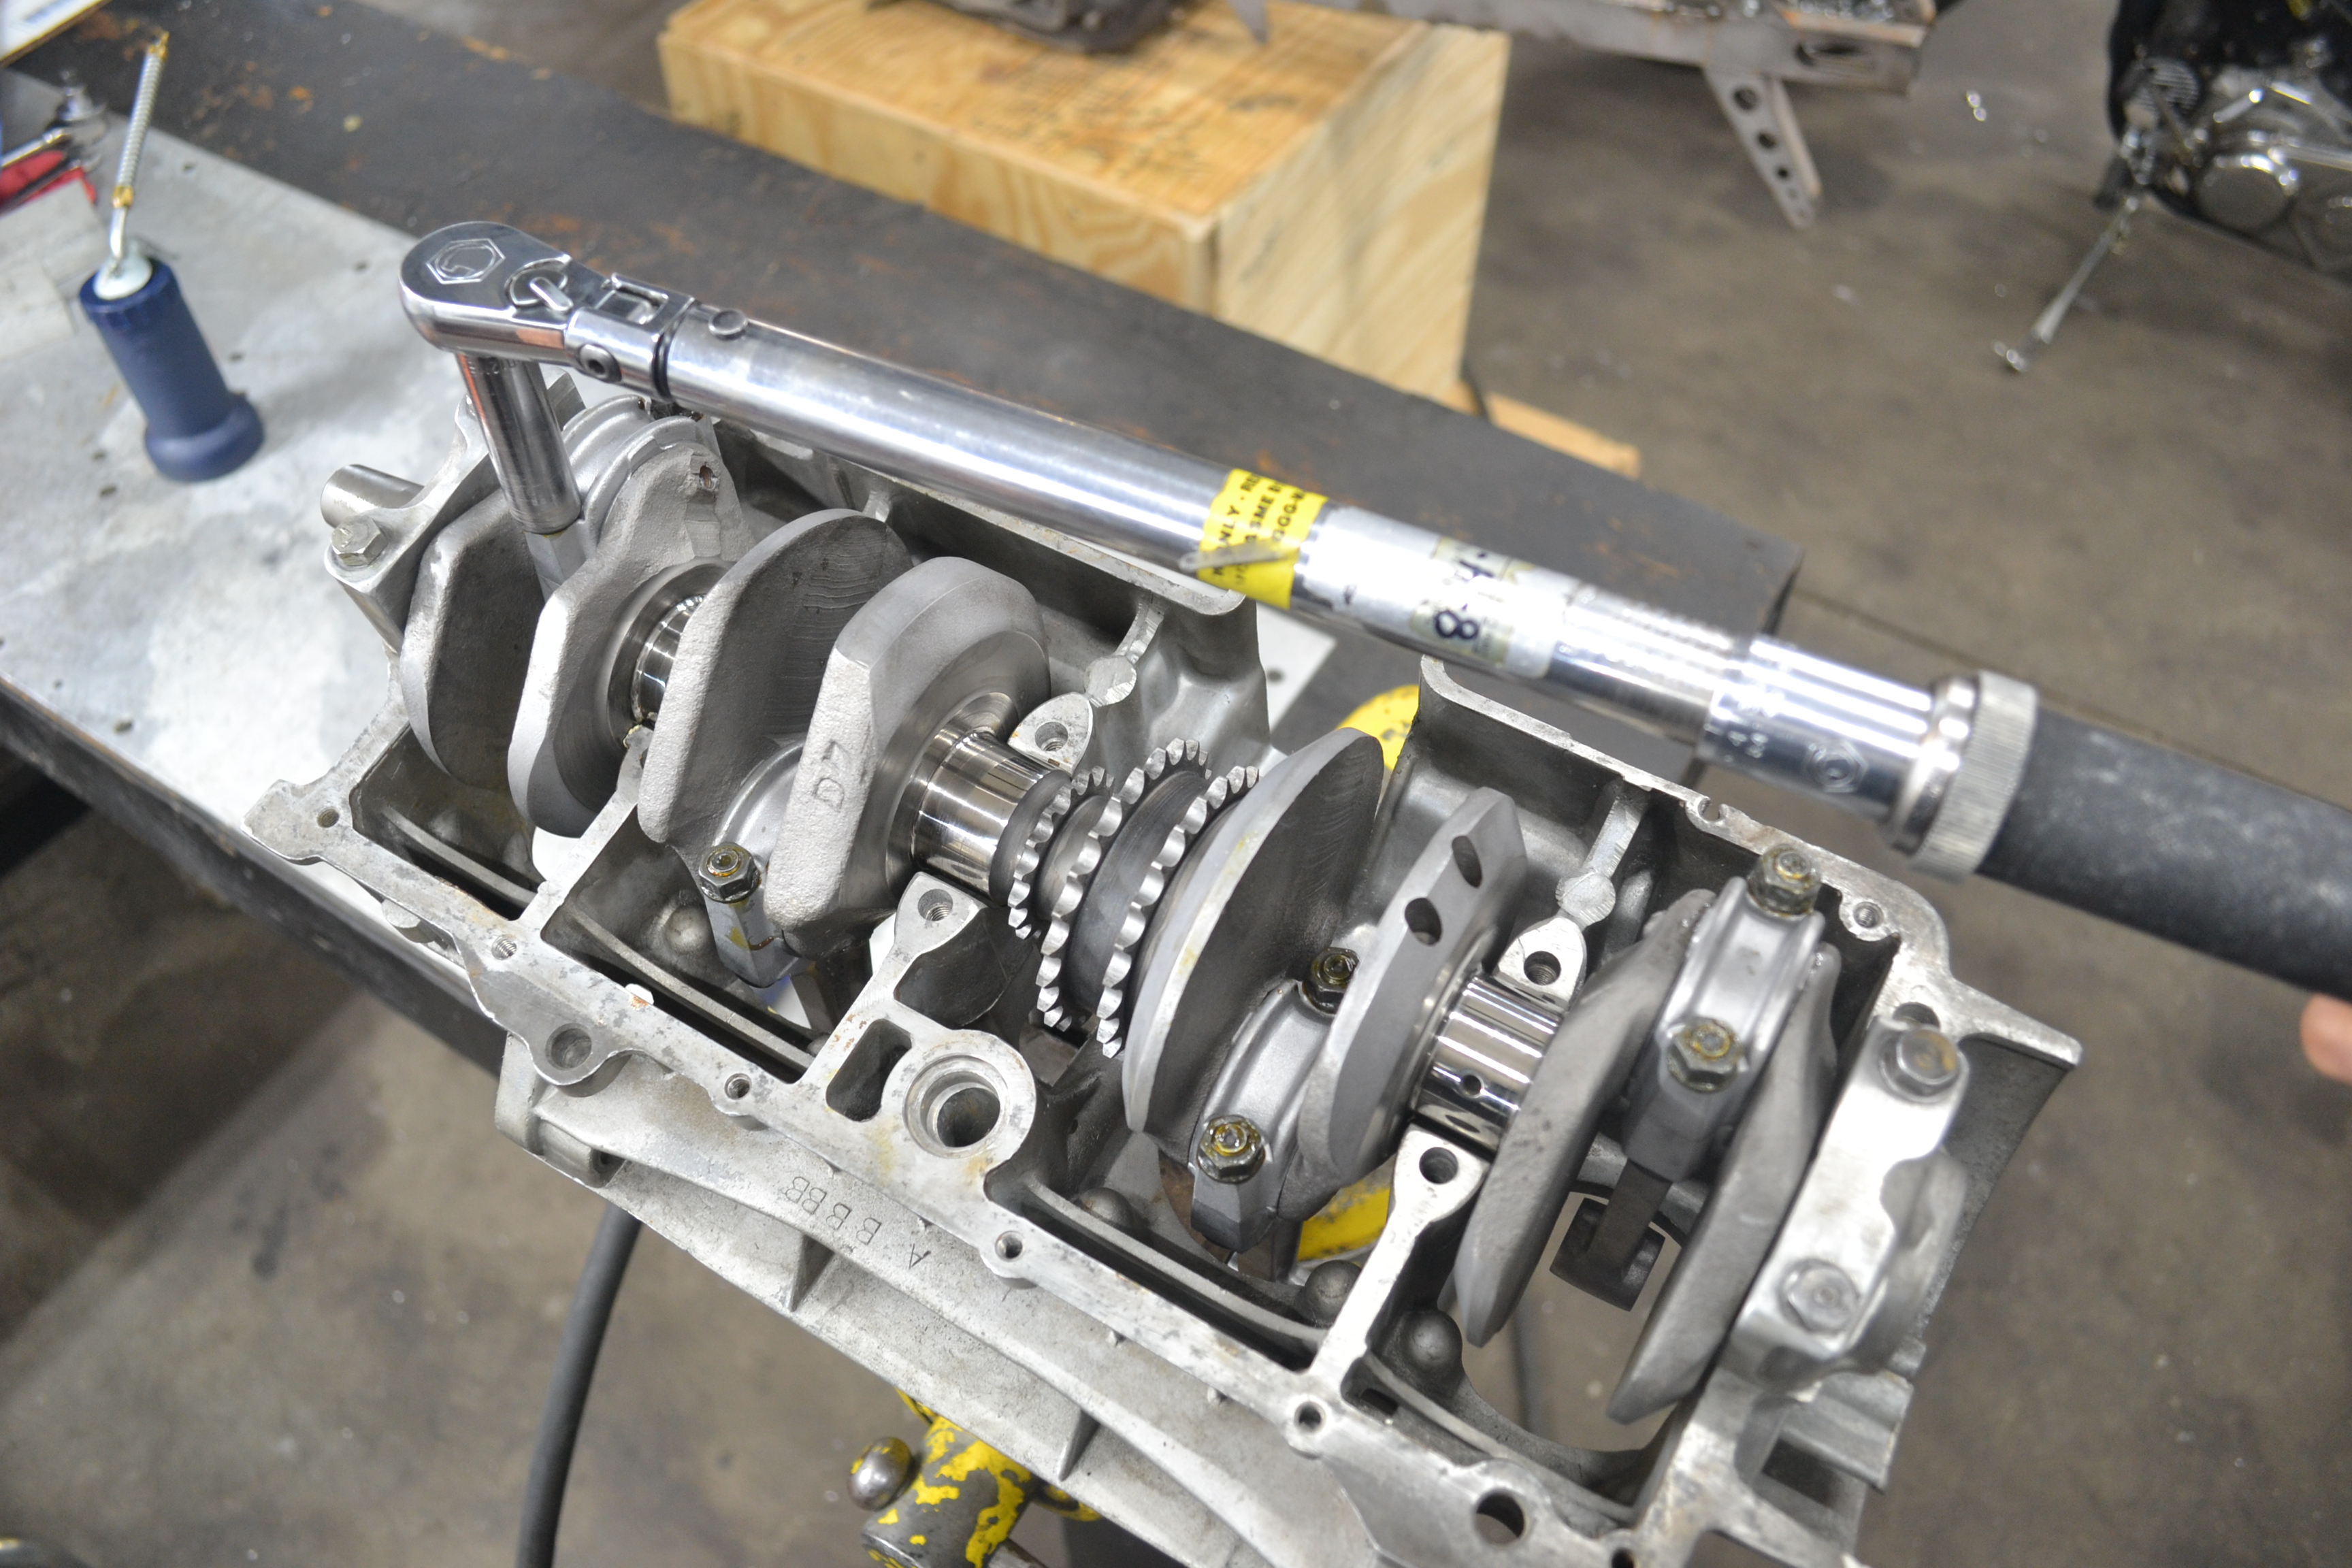
Tighten the head nuts in the Honda manual sequence in 5 lb increments.
Once the full torque has been reached (22 foot pounds)
Go back to #1 in the head torque sequence. Loosen, tighten to full
torque. Loosen, tighten to full torque, 6 times to all the cylinder head
nuts are 22 foot pounds.
Why is this important?
After the motor goes thru many heat cycles and the cylinder is expanding
and contracting, the threads settle in and if this burnishing technique
is not done, 3, 4, 5 pounds of torque will be lost.
This technique is a must for connecting rod bolts and studs.
Note:
Do not burnish the threads when installing the heavy-duty studs in the
cases.
Wait a minute...am I dreaming
this?
Is Honda so smart that they can determine specific
bolt stretch at specific torque specs?
Messing around in the shop years ago, trying to upgrade hardware (studs
and misc hardware) and were tightening various Honda OEM bolts to full
torque.
Just for kicks, we added a couple more pounds of torque. It seemed the
torque wrench needed up to 20ish degrees of turning to get a couple of
pounds more and so on.
The reason we brought this up is, high-level hardware will not do this
and is very consistent when tightening or torqueing.
What does this mean? Who knows, just messing around and observed this.
Or was I dreaming?
A 3.99% customer service charge is applied to all phone orders.
If ordering via phone, please also provide the part # of any products you are interested in for faster and more accurate service.
If you encounter a (rare) broken button as you're trying to add parts to your cart (going to PayPal summary instead of your cart or not opening PayPal at all) or anything else of concern, please call us to report it. We'll try to have it fixed for your convenience within the next 5-10 minutes. Afterwards, refresh the page and try again.
NOTE: As of July 1st, 2018, an extended goods and services tax (GST) has been applied to all Australian consumers buying overseas, charging an extra 10% in taxes to us with each purchase. To ensure that you can continue to purchase from us in Australia and we can provide our parts at our usual lower cost, please contact us at the email below if interested in any particular parts so that we can make a special shipping arrangement for you.
It is the sole and
exclusive responsibility of the purchaser to determine the suitability of any
part, product or work for his or her use.
The purchaser shall assume all legal, personal injury risk and liability and all
other obligations, duties and risks therewith.
There is no warranty on High Performance products.
Click to go back to our home page
Cycle X Global Headquarters
6246 US Hwy 51 South
Hazelhurst, WI 54531
Phone: 715-356-7346
Email: hotrodcyclex@gmail.com